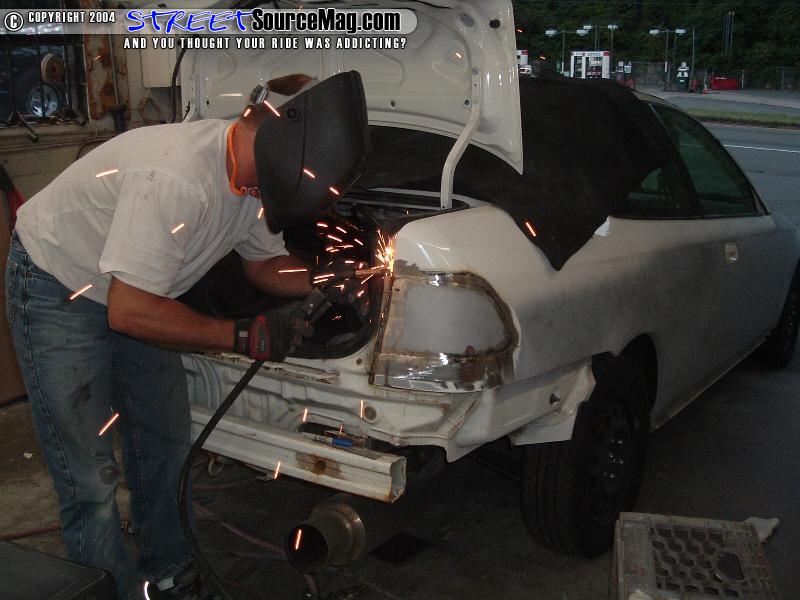
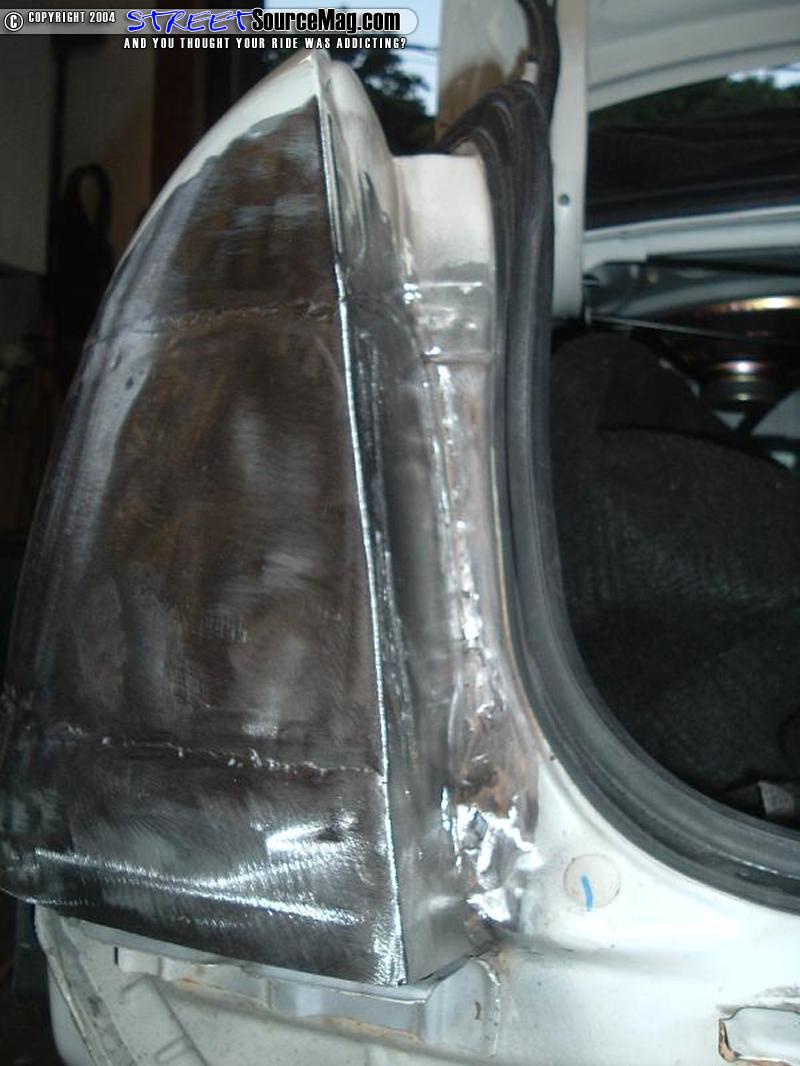
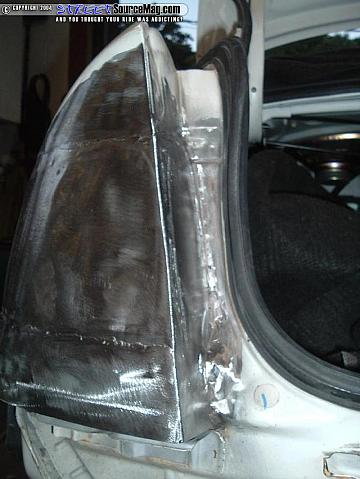
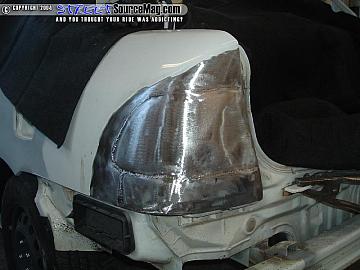
 I trimmed off the metal that was not needed and then we fit the inner jamb filler piece. This piece fit near perfect and we welded that in. Next we moved on to the passenger side were we followed the same steps. After the fillers were all welded in I ground down all of the welds and we checked for pin holes and air pockets. We had to weld a bit more and ground down the welds until it was ready for some plastic work. I trimmed off the metal that was not needed and then we fit the inner jamb filler piece. This piece fit near perfect and we welded that in. Next we moved on to the passenger side were we followed the same steps. After the fillers were all welded in I ground down all of the welds and we checked for pin holes and air pockets. We had to weld a bit more and ground down the welds until it was ready for some plastic work.
|
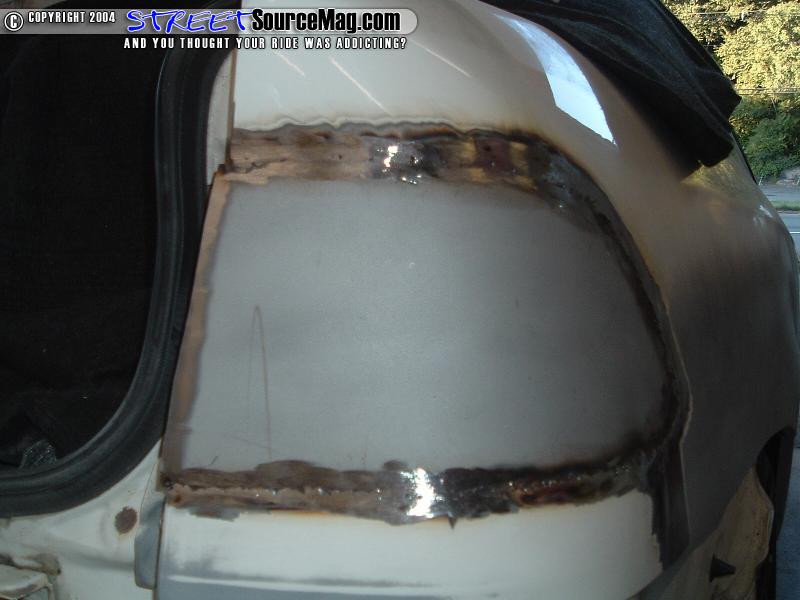
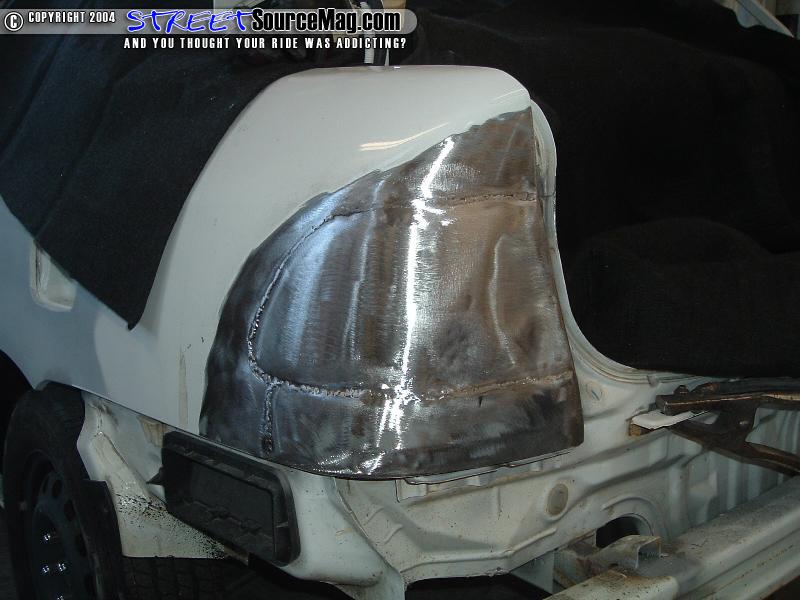
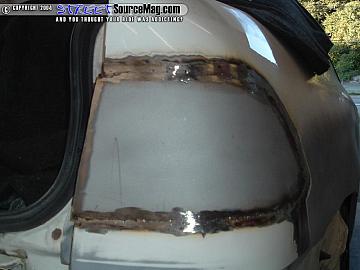  The whole area around the light and in the jamb was then sanded with 80grit sand paper. Next we applied a nice coat of Duraglass to each tail light. I waited for that to dry and block sanded it down with some 80, then 180, and last 320 until I had it were I wanted it. I then applied a layer of plastic over top of the Duraglass on each side. I hit it with 80 real quick to scuff off some of the heavy stuff, then sanded it through with 180 and 320. Make sure you feel the area around the light and the actual light to see if there are any waves in it. Sometimes from welding on the thin panels you can cause waves in the quarters. I was happy with the plastic work we had on there so we put 1 quick coat of skim coat to fill any pin holes that might come up later. That was sanded smooth with some 320 and then the tail lights were ready for prime. Inside the jamb I went a few steps ahead and grinded out the body panel seams then duraglassed and plasticed them until they were smoothed. I also filled the factory spot welds to give it a smoother look. The whole area around the light and in the jamb was then sanded with 80grit sand paper. Next we applied a nice coat of Duraglass to each tail light. I waited for that to dry and block sanded it down with some 80, then 180, and last 320 until I had it were I wanted it. I then applied a layer of plastic over top of the Duraglass on each side. I hit it with 80 real quick to scuff off some of the heavy stuff, then sanded it through with 180 and 320. Make sure you feel the area around the light and the actual light to see if there are any waves in it. Sometimes from welding on the thin panels you can cause waves in the quarters. I was happy with the plastic work we had on there so we put 1 quick coat of skim coat to fill any pin holes that might come up later. That was sanded smooth with some 320 and then the tail lights were ready for prime. Inside the jamb I went a few steps ahead and grinded out the body panel seams then duraglassed and plasticed them until they were smoothed. I also filled the factory spot welds to give it a smoother look.
|